Using Microsoft dev tunnels clientserver
When developing an ASP.NET or ASP.NET Core-based web application running on your developer machine, you can usually directly connect to the server using the pre-configured applicationUrl (e.g https://localhost:44359/). If you are, however, developing an Android or iOS application using MAUI or Avalonia, the application will run either on a physical device or on a local emulator/simulator and using localhost may not be an option.
To work around that, you can use Microsoft dev tunnels, that are available for both Visual Studio Code and Visual Studio.
Explaining these tools in detail is outside the scope of this guide. For that, refer to the following links to:
Change the issuer client
In order to use the tunnel, you need to change the Issuer of the client registration in the client project to point to the tunnel URL (e.g. MauiProgram.cs):
services.AddOpenIddict()
    .AddClient(options =>
    {
        // ...

        // Add a client registration matching the client application definition in the server project.
        options.AddRegistration(new OpenIddictClientRegistration
        {
            Issuer = new Uri("https://localhost:44395/", UriKind.Absolute),
            Issuer = new Uri("https://contoso.euw.devtunnels.ms/", UriKind.Absolute),
            ProviderName = "Local",

            ClientId = "maui",

            // This sample uses protocol activations with a custom URI scheme to handle callbacks.
            //
            // For more information on how to construct private-use URI schemes,
            // read https://www.rfc-editor.org/rfc/rfc8252#section-7.1 and
            // https://www.rfc-editor.org/rfc/rfc7595#section-3.8.
            PostLogoutRedirectUri = new Uri("com.openiddict.sandbox.maui.client:/callback/logout/local", UriKind.Absolute),
            RedirectUri = new Uri("com.openiddict.sandbox.maui.client:/callback/login/local", UriKind.Absolute),

            Scopes = { Scopes.Email, Scopes.Profile, Scopes.OfflineAccess, "demo_api" }
        });

    });
Use the tunnel domain
One common pitfall with Microsoft dev tunnels is that they do not forward their domain name to the server but direct traffic to localhost. This means that even though you connect to your server using the dev tunnels URL (e.g. https://contoso.euw.devtunnels.ms/), the request URL on your server will be https://localhost:44359/.
This causes a variety of issues such as:
The request forgery protection feature not working correctly due to the antiforgery cookie created using the tunnel domain (and thus not served to
localhost) being lost in the process.The OpenIddict client stack not being able to connect to the server from a remote machine (e.g. Android emulator) due to the server metadata (
/.well-known/openid-configuration) containing endpoints starting withhttps://localhost:44359/instead of the dev tunnel URL.
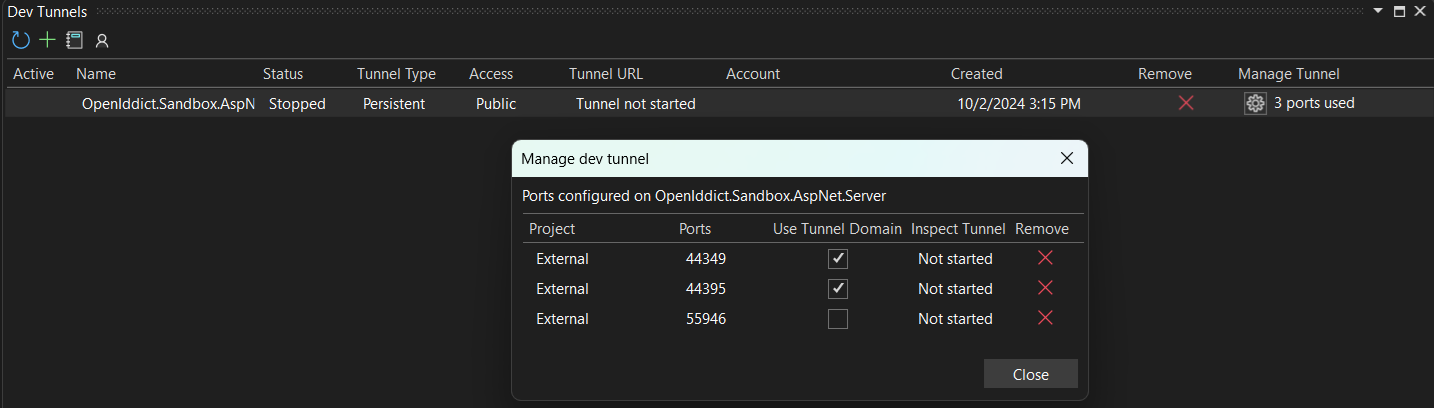
To fix this, you MUST check the Use Tunnel Domain checkbox in the Manage dev tunnel dialog:
Add a binding for IIS Express server
When running your authorization server in IIS Express, you will also have edit the applicationhost.config file and add a binding for your dev tunnel (otherwise you will get an error message when trying to connect to your authorization server via the tunnel URL).
TIP
For example, if your application listens on https://localhost:44359/ locally and your tunnel URL is https://contoso.euw.devtunnels.ms/:
<bindings>
  <binding protocol="http" bindingInformation="*:55946:localhost" />
  <binding protocol="https" bindingInformation="*:44359:localhost" />
  <binding protocol="https" bindingInformation="*:44359:contoso.euw.devtunnels.ms" />
</bindings>
Inspect network traffic
In case you want to trace or inspect the network traffic of your dev tunnel, simply add -inspect after the host name of your URL.
For example, https://contoso.euw.devtunnels.ms/ must be changed to https://contoso-inspect.euw.devtunnels.ms/.